The Print widget connects the web app with a printing service to allow the current map to print.
Use the Print widget
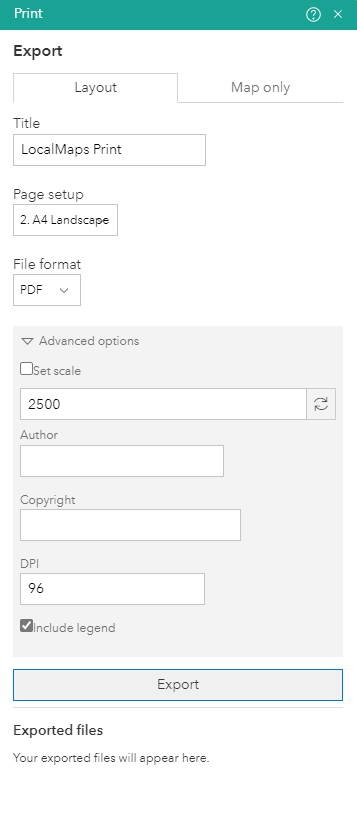
Click the print icon to open the Print widget.
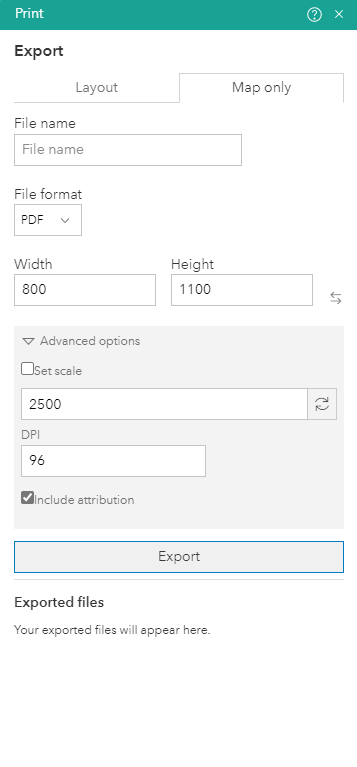
Select the applicable Layout and Format/Setup for the exported map. You have the option below ‘Export’ to Print the ‘Layout’ or ‘Map only’.
Type a title for the map in the Map Title text box.
Select the ‘File format’ and 'Page setup' that you would prefer.
Click the drop-down arrow beside advanced options to bring up some more choices.
Provide an updated value for the DPI (dots per inch) in the text box.
The scale will change as you zoom in and out on the map, if you click 'Set scale' it will freeze the scale and print the scale the map was at when you set it.
There is also the option which is set by default to ‘Include legend’, so if you would not like the legend then untick this box.
If you are printing ‘Map only’, you can provide dimensions for the Width and Height properties in pixels. Otherwise, these values are ignored.
After all options have been set with the applicable values, click Export to submit all the information.
Upon completion of the print job, a link to the print output displays in your ‘Exported files’. Click the link to open the file in a new window.
Need help finding information?
Search the LocalMaps User Guide
Talk to an expert
Email LocalMaps Support to ask a question or request assistance.